
How to Read a Cross-Stitch Chart
Learn how to use the grid, symbols, color key, and page guides on a cross-stitch chart, then follow a simple routine for stitching without losing your place.
A cross-stitch chart is a map of your design. Each square on its grid represents a position on the fabric, while the marks inside the squares tell you what to stitch there. Once you know how to read the key and keep your place, even a detailed chart becomes a series of small, manageable sections.
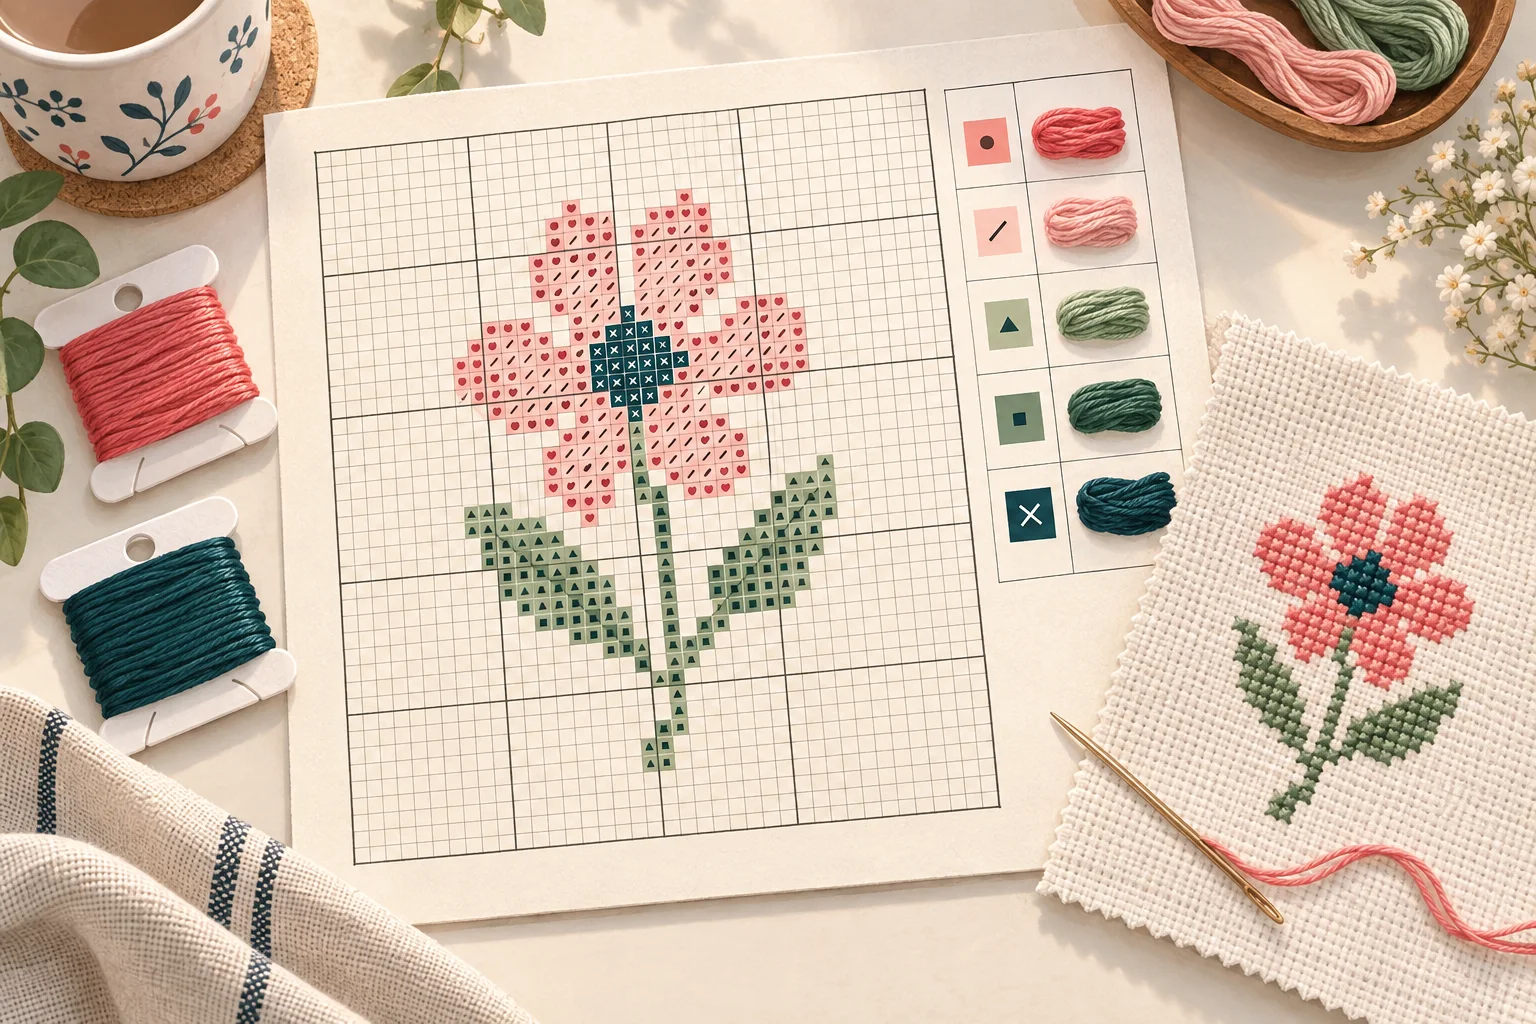
The illustration introduces the parts of a chart; use your pattern's own key for its exact symbols and colors.
Start with the grid
On a standard counted cross-stitch chart, one small square usually represents one full cross stitch. The horizontal and vertical grid lines help you count where each stitch belongs. Darker lines often divide the chart into groups of ten squares, making longer distances easier to count.
Before you begin, check the chart's stated stitch width and height. Find its center marks if you plan to start in the middle, or identify a clear corner or landmark if you prefer to start elsewhere. Make sure you can match your chosen starting point to a spot on the fabric.
An empty square usually means no stitch in that position. Check the pattern notes, especially if the design has background stitching or uses several stitch types.
Match each symbol to the key
The chart key connects each symbol to a thread color. It may also give a DMC number, color name, and the number of strands to use. Find a symbol on the chart, look it up in the key, then use the listed thread for those squares.
Symbols matter even when a chart is printed in color: nearby shades can look almost identical, and printers or screens can shift their appearance. If two symbols are easy to confuse, mark their entries on a working copy of the key or keep the matching floss bobbins beside it.
Some charts show color alone, symbols alone, or both together. In Crosspic, you can choose a color, symbol, or combined chart when preparing a pattern for printing. Choose the version you can read comfortably at its printed size.
Notice other stitch marks
Not every mark represents a full cross. A diagonal mark within part of a square may indicate a fractional stitch. Small dots or circles can mark knots. Thin lines running between grid points often indicate backstitch. The exact notation varies by pattern, so read its key and any stitch instructions before working those details.
It is fine to stitch the main crosses first and return to outlines or knots later, provided you can still locate them accurately on the chart.
Follow the chart one section at a time
Choose a small area near your starting point and locate the same area on the fabric. Count from a known stitch or grid line, stitch a short run of one color, and check your position again. A ten-by-ten-square block is a useful unit for checking progress, but you can work in smaller sections when the design is dense.
On a printed working copy, lightly mark completed stitches with a pencil or highlighter that does not hide the symbols. Keep an untouched copy if you want a clean reference. When the chart spans several pages, use the page labels and overlap or alignment guides to confirm where the next section continues; do not stitch repeated overlap squares twice.
If a section looks wrong, stop and recount from the last point you know is correct. Correcting a few stitches early is easier than carrying a counting error across the design.
A quick first-chart routine
- Read the pattern notes and identify its stitch types, dimensions, and thread key.
- Pick a starting point on both the chart and fabric.
- Find the first symbol in the key and prepare its thread.
- Stitch a small area, counting from a reliable landmark.
- Mark your progress and check the stitched shape against the chart before moving on.
If you want to practice with a small design, try the free unicorn cross-stitch pattern. Its stitched preview and combined chart let you compare how the finished stitches relate to the grid and symbols.