
Free Photo to Cross Stitch Pattern Maker
Turn a favorite photo or image into a counted cross-stitch pattern. Choose the stitch dimensions, match colors to DMC floss, and fine-tune the design before downloading a printable chart.
Free to create and export · No account needed · Images processed in your browser
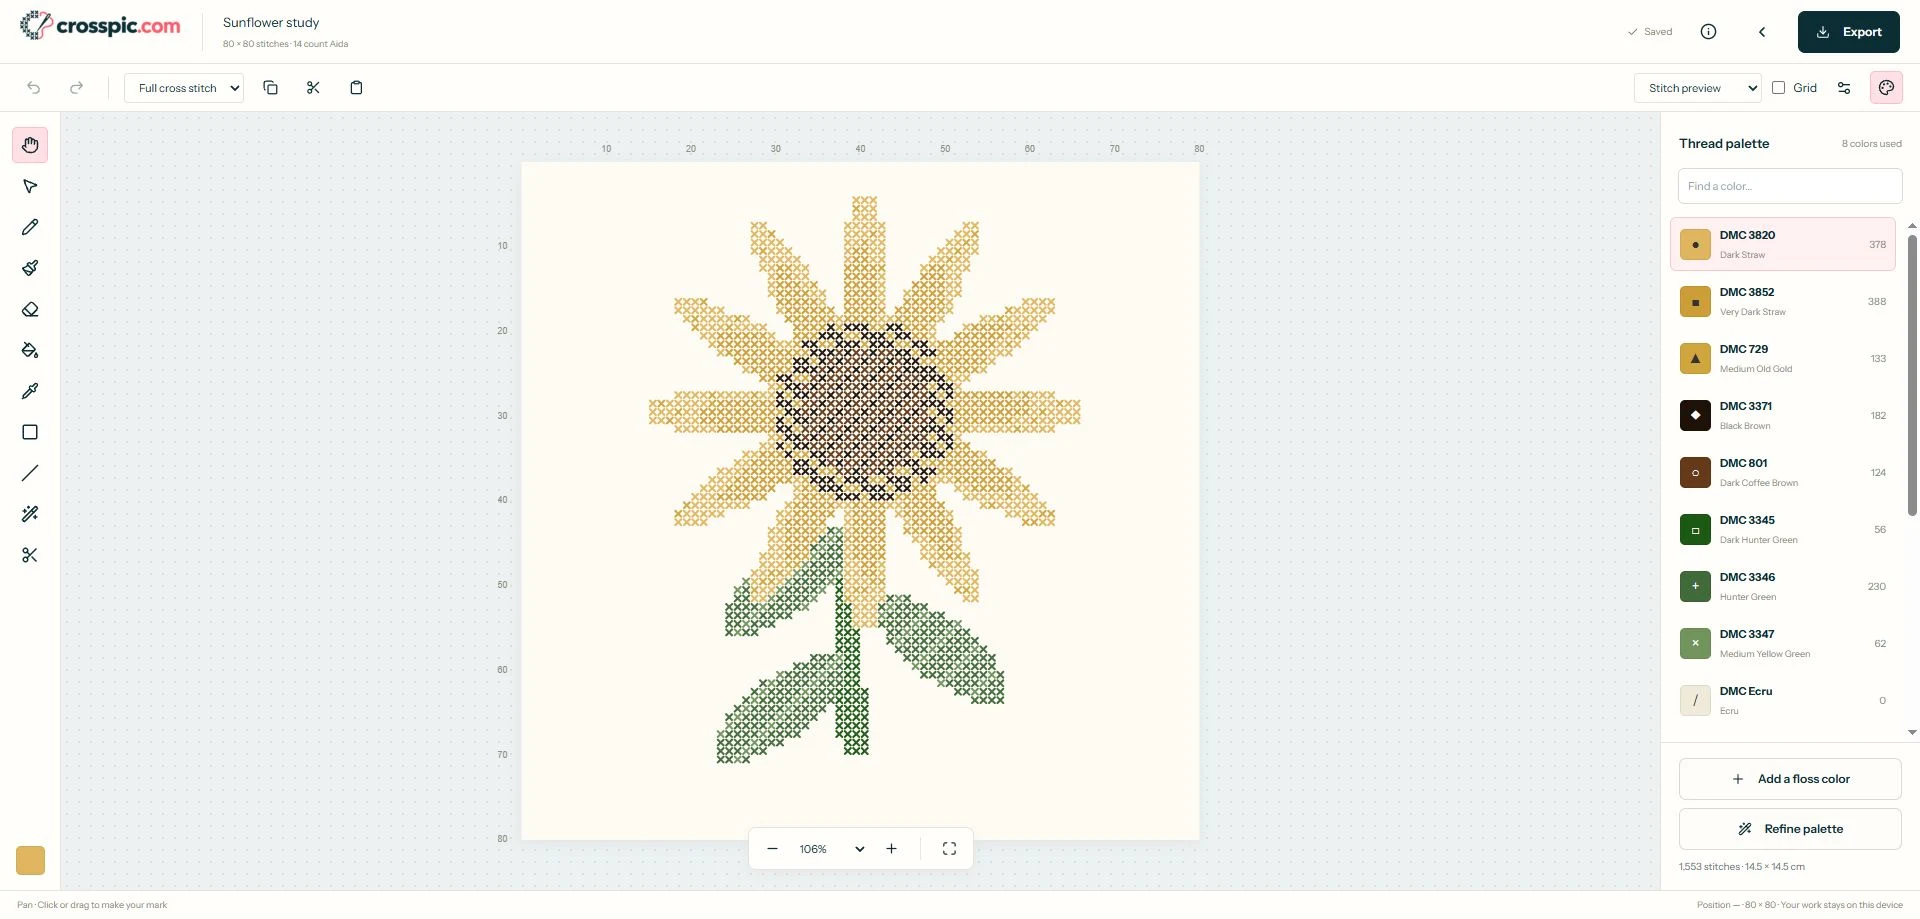
How to turn a photo into a cross-stitch pattern
Choose and crop your image
Open the image converter and select a JPG, PNG, or WebP from your device. Crop around the subject and rotate if needed to remove distracting background space.
Set dimensions and colors
Choose the width and height in stitches, fabric count, and maximum color count. Crosspic converts the image into a grid using DMC floss colors. Review the preview before opening the editor.
Refine, export, and stitch
Clean up stray stitches, adjust the palette, and check the symbols. Download a printable PDF and an editable project backup when you are happy with the design.
What images work best?
Start with a sharp photo, strong contrast, and one clear subject. A close crop of a pet or a face gives important features more stitches than a wide scene. Simple illustrations and bold silhouettes are easier to simplify into a small grid.
Busy backgrounds, tiny lettering, and soft shadows can produce scattered stitches. Crop or simplify the source first, then check whether eyes, outlines, and other defining details survive conversion.
Choosing pattern dimensions
Each grid cell is a stitch position. More stitches give details more room but increase the work. Try an 80–100-stitch width for simple artwork, then compare a larger preview for a detailed photo. These are starting points rather than fixed rules.
On 14-count Aida, 140 stitches span 10 inches (about 25.4 cm). That is the stitched area; add fabric margins separately. The importer shows finished dimensions for your fabric count and supports grids up to 500 × 500 stitches.
Choosing the number of DMC colors
Try 10–20 colors for a simple motif or 20–40 for a photo with shading, then compare the preview. Fewer colors can make stitching easier; more can preserve transitions but leave more isolated stitches.
Set a maximum of 2–100 colors and exclude DMC shades during import if needed. Digital matches are approximations: compare physical floss when color accuracy matters. Follow the palette cleanup guide to refine the result.
Editing the generated pattern
Conversion is a starting point. Use the pencil, eraser, eyedropper, and fill tools to sharpen an edge, restore a highlight, or remove background stitches. Replace or merge similar colors and inspect isolated stitches before removing them.
Switch between stitched, color, and symbol views to inspect the design and chart. Add supported fractional stitches or backstitch for details. The tool and shortcut guide explains the controls.
Printing and exporting your pattern
Export PDF color, symbol, or combined charts on A4 or US Letter paper. Adjust stitches per page, grid numbering, and page overlap, then check the preview and thread key. Print a test page to confirm the symbols are readable.
PNG export gives you a picture of the design. Save a separate .crosspic file for future edits and device transfers. See the printing guide and learn how to read a chart.
Why use Crosspic?
Go from photo conversion to stitch editing and printable charts in one browser workspace. There is no software to install or account to create. Image conversion and pattern editing run locally; projects stay in the current browser.
Export backups for important work: browser storage is not cloud synchronization. Read the privacy policy for separate website services, or explore the full product guide.
Try a pattern before importing your photo
Explore the editable sunflower sample or use the cross stitch chart maker to draw a design from scratch. For a ready-made printable chart, download the free unicorn pattern.
Frequently asked questions
Is this cross stitch pattern maker free?
Yes. Image conversion, editing, and PDF, PNG, and editable project exports are free. No account is required.
What image files can I use?
Import JPG, PNG, or WebP files. Photos, drawings, and digital artwork can all become patterns. Use images you own or have permission to use.
Are my photos uploaded?
During ordinary editor use, conversion runs locally in your browser. Source images and pattern contents are not uploaded to a Crosspic server. Website analytics and advertising are separate services described in the privacy policy.
What are the size and color limits?
Choose 1 to 500 stitches on each side and a maximum palette setting of 2 to 100 colors. The converted result may use fewer colors than the selected limit.
Can I edit and print the result?
Yes. Edit stitches and palette colors, then export a PDF with color, symbol, or combined charts. PNG export provides a picture of the design. Save a separate .crosspic backup to preserve the editable project.
Will my projects sync between devices?
No. Projects are saved in the current browser. Export a .crosspic backup to move a project to another device. Clearing browser data can remove saved projects.
Give your favorite photo a place on the grid.
Start with an image, compare the preview, and make every stitch your own.
Create my photo pattern